
Anatomy of a Timesheet
Here are the features of the timesheet grid
Understanding the Timesheet
The timesheet is where users record time, expenses, mileage, and overtime. While it looks simple at first glance, there are several built-in features that make navigating and entering time faster and more accurate.
User Side Panel
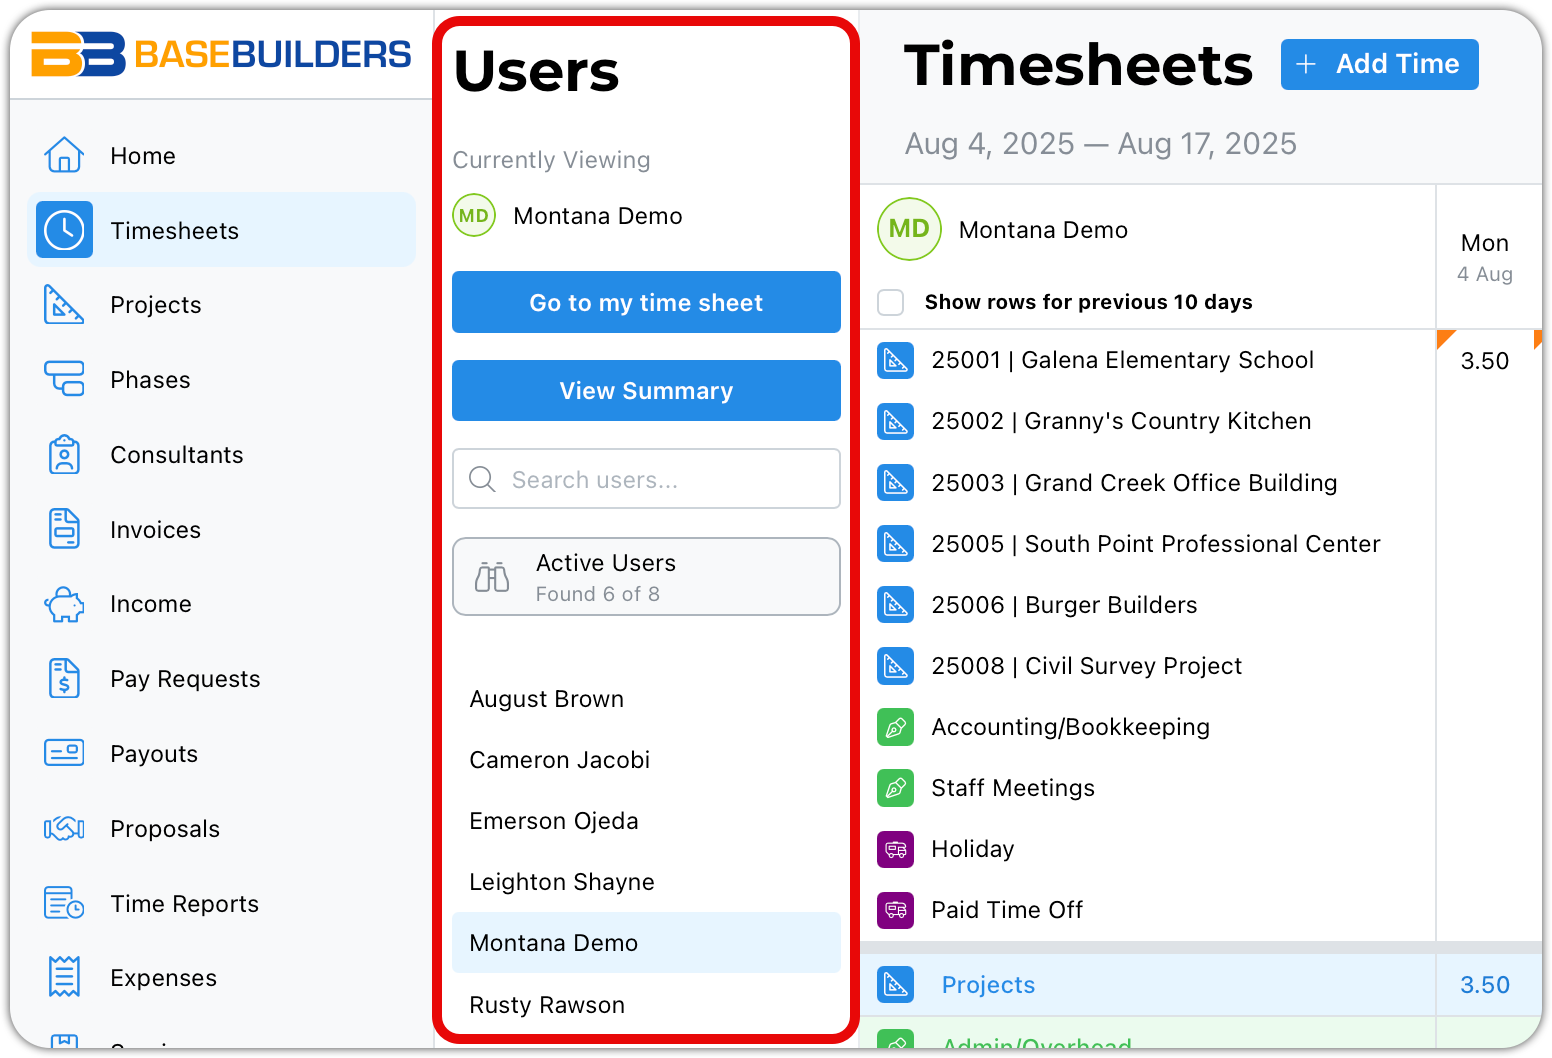
- You can search for users and filter the list (for example, viewing only active users).
- Depending on your permissions, you may be able to:
- View other users’ timesheets
- Edit other users’ time slips
- Permissions are controlled by your system administrator.
If you have access, you can click a user’s name to switch who's timesheet you’re viewing.
At any time, you can return to your own timesheet using Go to My Timesheet, even if your name is not visible in the side panel.
Viewing a Summary vs. a Single Timesheet
- View Summary displays one row per user in the grid.
- Go to My Timesheet switches back to your individual timesheet view.
Collapsing the User Sidepanel
The user side panel can be collapsed to make more room for the timesheet grid. This is especially helpful when viewing a pay period, where additional columns might otherwise be partially hidden.
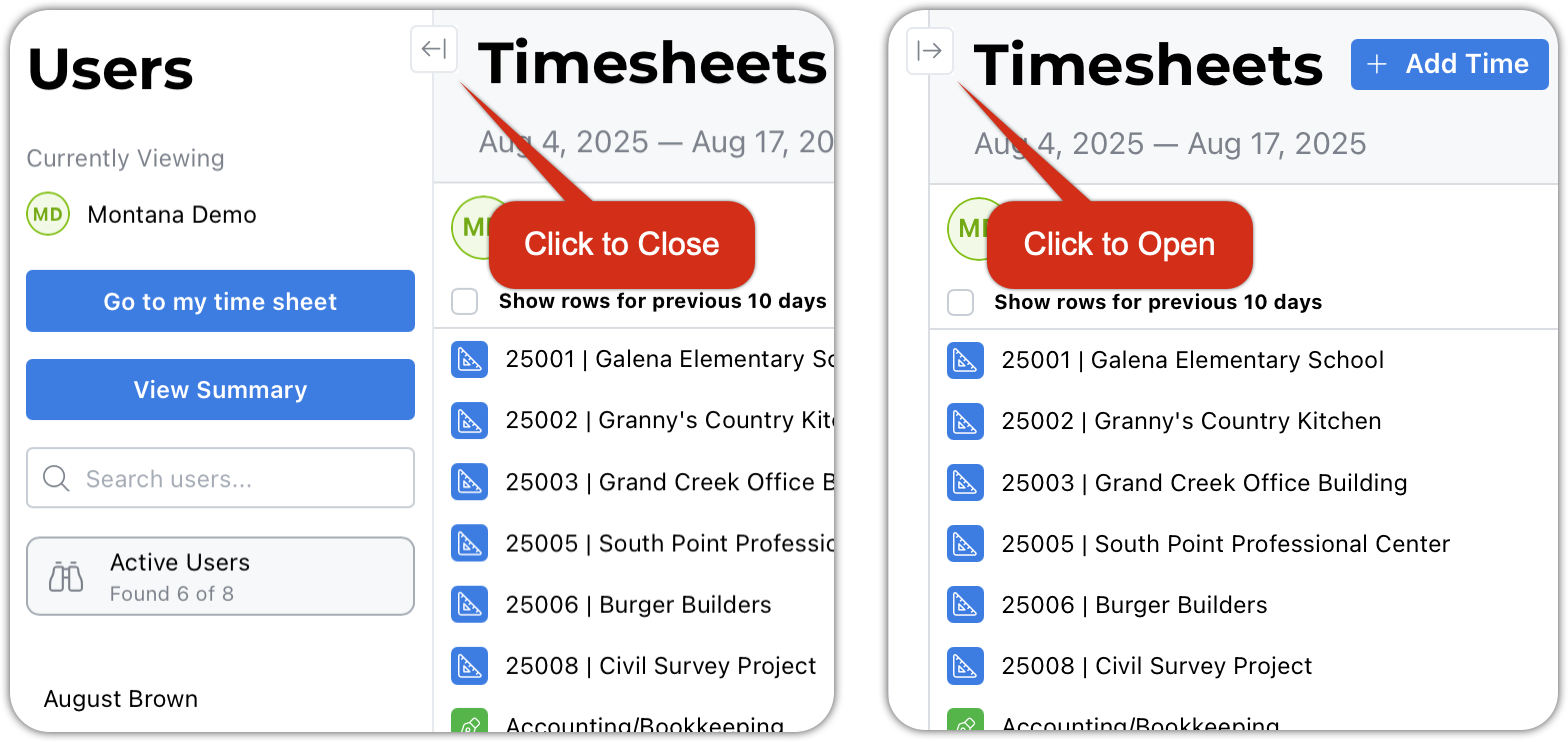
You can collapse or expand the side panel in two ways:
- Click the collapse icon, or
- Press the square bracket keys, [ or ] , on your keyboard (both keys work as a toggle)
Timesheet Grid Layout
Time Sheet rows are grouped in the following order:
- Projects - Blue
- Proposals - Orange
- Admin Time - Green
- Benefits - Purple
At the bottom of the grid, you’ll see summaries for each category—but only for categories that appear in the current view.
Viewing Week, Pay Period, or Month
You can control how much time is displayed using the view selector.
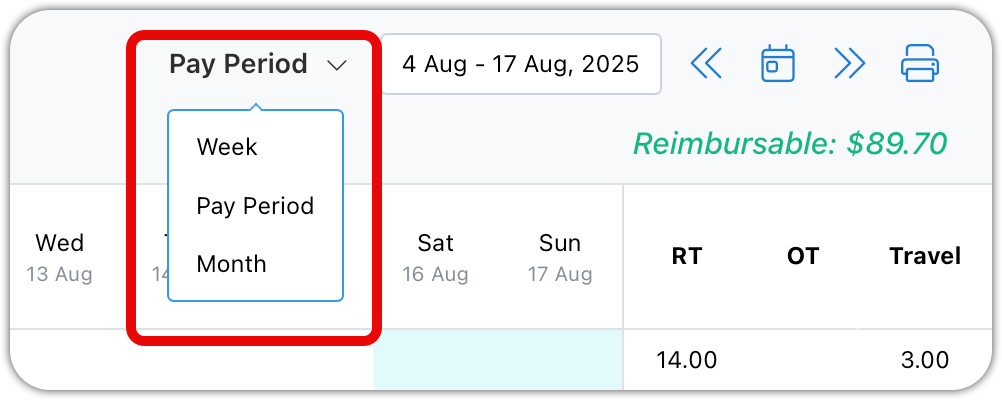
The selected view determines both what you see on screen and what will print.
As you move forward or backward in time, only rows that contain time for the selected dates will appear.
Adding Time
If you need to add time to something that is not currently displayed:
- Click Add Time
- Choose whether to add:
- Project time
- Proposal time
- Admin time
- Benefits time
Once time is added, the corresponding row will appear in the grid.
Working in the Grid
Adding or Editing Time
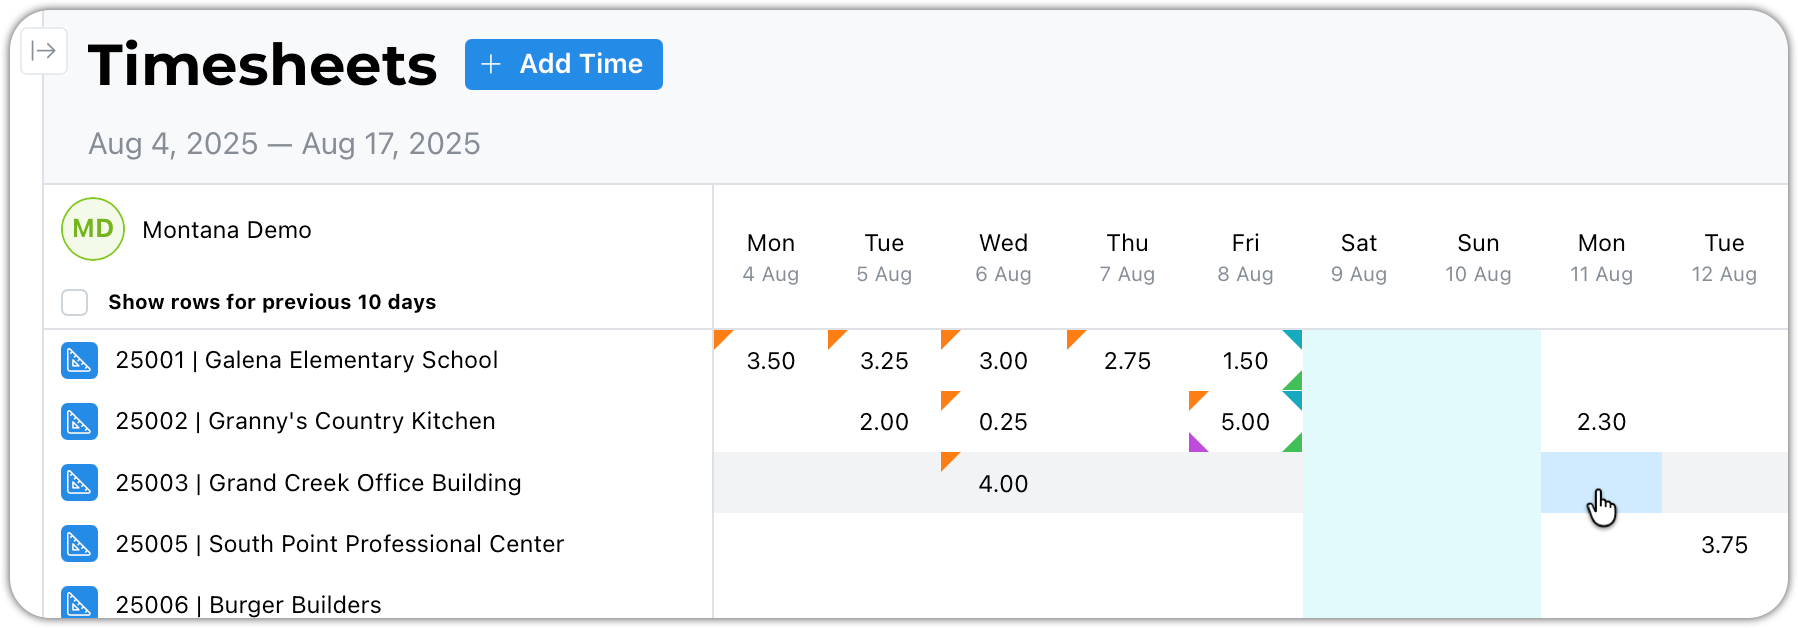
* Click an empty cell to create a new time slip. * Click a cell containing time to edit existing time slips or to add additional time to the same day & project.
Hot Corners (Hidden Details)
Each cell in the grid can contain additional details, shown using small highlighted corners.::
- Upper-left corner: Displays the time slip comments.
- Upper-right corner: Displays mileage recorded for that day.
- Lower-right corner: Displays expenses and services recorded on the time slips.
- Lower-left corner: Indicates overtime is included in the hours.
Navigation Controls
You can use either the calendar or the arrows to navigate between weeks, pay periods, or months.
Reimbursable Totals
The reimbursable total shows how much reimbursable expense has been recorded in the current view.
Printing Timesheets
To print a timesheet:
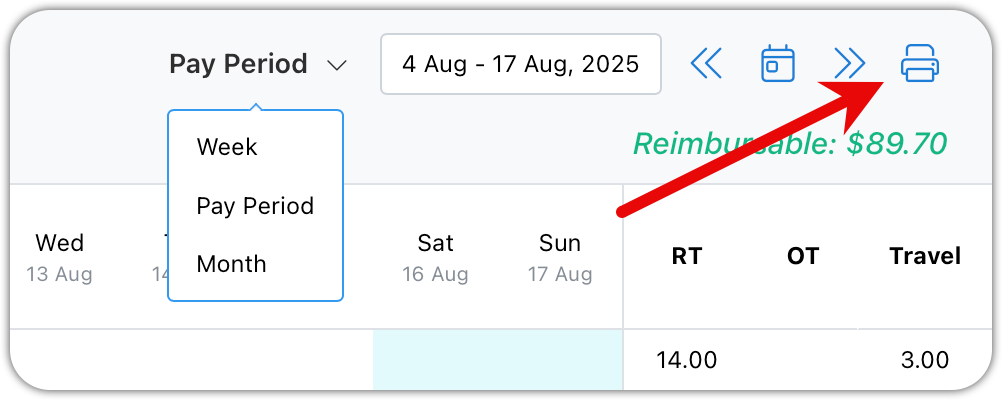
- Click Print
- Choose whether to print
- The current user
- All staff (if permitted)
- Select paper size and orientation
- Select from the presented options and click print.
Printing Tips
- Month views often contain too much information to print clearly on standard paper.
- Larger paper sizes (such as 11×17) may be required for month views.
- Printing by pay period typically produces the most readable results.
Final Notes
The timesheet is designed to be flexible for daily entry, review, and reporting. Collapsing panels, switching views, and using hot corners can significantly improve visibility and efficiency.